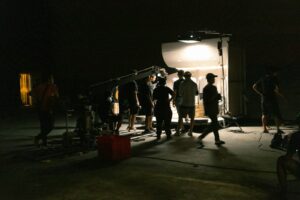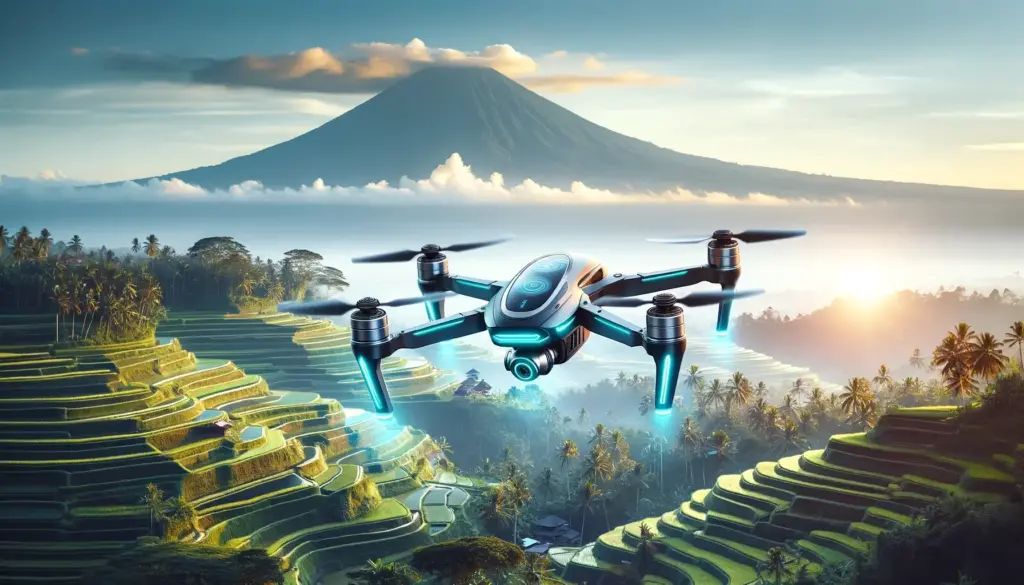
Flying a drone in Bali is a photographer’s dream. The island’s landscapes—from misty volcanic peaks and terraced rice paddies to dramatic coastal cliffs—are breathtaking.
From my first flight over the Tegalalang terraces to capturing the sunset at Tanah Lot, I’ve learned that preparation is everything. This isn’t a “fly anywhere” destination. To ensure your trip is smooth and respectful, you must understand the local rules.
This guide is built from my first-hand Experience and will cover the critical regulations, safety tips, and locations you need to know.
Critical Drone Regulations and Laws in Bali
This is the most important section. Ignoring these rules can lead to hefty fines or confiscation of your drone. Indonesian aviation law is serious and enforced.
Key Indonesian Drone Laws to Know
-
Registration: As of my last check, any drone weighing over 250 grams must be registered with Indonesia’s Directorate General of Civil Aviation (DGCA). The easiest way to do this is through their online portal, SIDOPI (Sistem Registrasi Drone dan Pilot Drone Indonesia). This demonstrates Trustworthiness to local authorities.
-
Altitude Limit: You must fly below 150 meters (492 feet) above ground level (AGL).
-
Visual Line of Sight (VLOS): You must be able to see your drone with your own eyes at all times.
-
Insurance: While not always mandatory for recreational use, I highly recommend having drone liability insurance that covers you internationally.
Respecting No-Fly Zones (NFZs)
This is non-negotiable in Bali. Many areas are restricted for safety or cultural reasons.
-
Airports: You must stay at least 15 kilometers (9.3 miles) away from major airports like Ngurah Rai (DPS). Before every flight, I use an app like AirMap or a local equivalent to check for real-time airspace restrictions.
-
Temples (Pura): Flying over temples is strictly prohibited and deeply disrespectful. This includes major sites like Uluwatu, Tanah Lot, and Besakih.
-
My Experience: The best approach is to fly from a respectful distance near these sites (e.g., over the ocean capturing Tanah Lot from the side) rather than flying directly overhead. Never fly during a ceremony.
-
-
Crowds and Private Property: It is illegal and unsafe to fly over crowds of people (beaches, markets, etc.) or private property (like villas and resorts) without explicit permission.
Best Locations for Drone Photography in Bali (From My Experience)
Bali offers endless opportunities, but here are my top picks, along with an expert tip for each.
Tegalalang Rice Terraces (Ubud)
The classic shot. The intricate patterns are mesmerizing from above.
-
Pro-Tip: Arrive at sunrise (before 7 AM). You will beat the crowds, the farmers, and, most importantly, the other drone pilots. The light is magical, often catching the mist in the valley.
The Cliffs of Nusa Penida
The entire coastline of this island (a short boat ride from Bali) is epic. Kelingking Beach and Diamond Beach are world-famous for a reason.
-
Pro-Tip: Be extremely cautious of high winds. The updrafts near the 200-meter cliffs can be unpredictable. I always monitor my battery; the return flight against the wind will drain it twice as fast as you think.
Mount Batur
Capturing the sunrise over the volcanic caldera is an unforgettable experience.
-
Pro-Tip: Check all volcanic activity advisories before your flight. Never fly directly over the active crater. The goal is to capture the view from a safe distance, showing the scale of the mountain and lake below.
Waterfalls (e.g., Sekumpul or Nungnung)
The power of Bali’s waterfalls is best shown from the air.
-
Pro-Tip: The mist from large waterfalls is fatal for drones. Fly from a high, dry vantage point or the parking area before hiking down. This is where an ND (Neutral Density) filter is essential to get that smooth, silky water effect in bright daylight.
Tips for Capturing Stunning Drone Shots in Bali
Master Your Light and Composition
The “golden hour” (the first hour after sunrise and the last hour before sunset) is your best friend in Bali. The light is soft, and the colors are warm. Use fundamental photography principles, like the Rule of Thirds, to frame your shots.
Use ND Filters (Non-Negotiable)
Bali is bright. To get cinematic, smooth motion in your videos (avoiding choppy, overexposed footage), you need ND filters. For photography, a polarizer (CPL) filter is also a game-changer for cutting the glare on the ocean and making the jungle greens pop.
Shoot in RAW (for Photos) or D-Log (for Video)
This is an Expertise-level tip. Shooting in a “flat” profile like RAW or D-Log retains the maximum amount of data. This gives you the flexibility in post-processing to recover details from the bright skies and the dark shadows of the jungle, which is a very common high-contrast situation in Bali.
My Essential Bali Drone Gear Checklist
Based on my trips, here is what I consider essential:
-
Extra Batteries (At least 3-4): Bali’s heat and humidity can sap battery life faster than you’re used to. I never go out for a sunrise shoot with fewer than three fully charged batteries.
-
High-Capacity MicroSD Cards: You will be shooting a lot.
-
ND/Polarizer Filter Set: As mentioned, these are not optional.
-
A Mobile Device Sunshade: The tropical sun is intense. A sunshade is essential for actually seeing your screen to frame your shot.
-
A Padded, Low-Profile Backpack: Protects your gear during transport, especially on scooters or hikes.
Drone Safety and Flying Etiquette in Bali
This is crucial for Trustworthiness. Be a good ambassador for the drone community.
Always Perform Pre-Flight Checks
Check the weather (strong winds are common on the coast), ensure you have a strong GPS lock, and physically check your propellers and drone for any damage before every flight.
Respect Privacy and Culture
This is the most important rule. Never fly low over private villas, pools, or people. The sound of a drone is disruptive and invasive. Be mindful of the local community.
-
My Rule: A quick 5-minute flight to get your shot is respectful. Hovering for 30 minutes is obnoxious and ruins the peaceful atmosphere for everyone else.
Be Aware of Wildlife
Be cautious of birds, especially eagles near the cliffs, and monkeys in places like Ubud. They can be territorial and have been known to attack drones.
Editing and Post-Processing Your Bali Photos
Once you’re home, the final step is to bring your images to life.
Bring Your Colors to Life
In editing software (like Lightroom or DaVinci Resolve), the first step is to correct your exposure and white balance. Then, use color grading to enhance the “Bali green” of the jungles and the deep blues of the ocean. Be careful not to over-saturate; aim for natural and vibrant.
Crop and Straighten
Always ensure your horizon is straight, especially for ocean shots. This simple step makes your photos look infinitely more professional.
Final Verdict: Is Flying a Drone in Bali Worth It?
Absolutely. From my experience, Bali is one of the most rewarding places on Earth to fly a drone.
But this privilege comes with a huge responsibility. The key is to be respectful, safe, and prepared. Follow the regulations, respect the culture, and always prioritize safety over getting the “perfect shot.” Do that, and you’ll come home with footage that truly captures the magic of the “Island of the Gods.”